01 09 10

Tuesday, March 12, 2013

How~to: St. Patty's Day Shamrock Picks

Swirly Designs is sharing a little Luck O' the Irish with you today! Join us and craft up this simple Shamrock Pick to fancy up your dessert table this Saint Patrick's Day.  
It's easy! Let's get started:


Materials: 
• Green card stock (solid or you can use a print)
• 1/16" hole punch
• heart shape punch
• mini circle brads
• bent nose jewelry pliers
• toothpicks
• green food coloring
• small bowl 
  
Step 1.
Following the direction on the food coloring box, mix the shade of green that will complement your green paper. Add in your toothpicks and let them sit approx 15 -20 minutes. The longer they sit in the solution the darker your toothpicks will be. 
Step 2.
Remove toothpicks from the dye and let them dry completely.
Step 3.
Take some green card stock and a heart shape punch and punch out three hearts. (You will need three hearts to make one shamrock so for every one you are planning to make times by 3)
Step 4.
Stack the three heart shapes together and with a 1/16" hole punch, punch a hole about an 1/8" up from the bottom of the heart shape.
Step 5.
Insert a mini circle brad through the 1/8" hole in all three heart cut outs.
Step 6.
Open the brad ends and lay your dried tooth pick in the middle, and then close the brad.
Step 7.
Use your bent nose jewelry pliers to secure the brad tighter to your toothpick. Then spread apart your hearts to create your shamrock.
Once you get one done you can really crank these out fast. Use on your cupcakes, Irish soda bread or you can write your guests name on each for place cards.
HAPPY ST. PATRICK'S DAY!!
~Lianne & Paul
This project is for personal, non-commercial use ONLY.

Monday, March 11, 2013

DIY Easter Egg Garland


Here is a simple project to dress up your staircase, mantel or door way just in time for Easter. 
All you need is a some yarn, a few bags of plastic eggs, a couple of thumb tacks and scissors.  
First cut the yarn to fit the length of your staircase, adding a few inches to make it "swag".
Then it's time to add the eggs. We really liked these transparent eggs because it allows the eggs to shine in the sunlight.
Depending how much space you want between your eggs will determine how many you will need. Open an egg, lay the yarn in the center of the egg and then snap it close. It's as  simple as that!
We decided to keep this garland simple but you can embellish yours even more by adding more eggs, put something in them, string beads or glue paper flowers between the eggs. Be creative. 
~Happy Egg~ster 

Friday, March 8, 2013

Always have the holidays on the brain....

We had an impromptu Lego day at the studio this week when the kids came home from school. They wanted to build some lego cars and have a race. So we sat down and dove into our sons many bins of Lego pieces to start creating. We had recently spent a whole weekend organizing his legos giving each bin its own color. But of course now we're thinking it might have been even more helpful to have each bin have sections for each different sized pieces. Alas that organizing challenge is not really the point the of this post...

When I was trying to think of what to make for my speedster, I was getting pretty overwhelmed with what to do. I was trying to approach this project as I would a new design collection - lots of research and sketches..blah blah. So I just stopped and observed how the kids were working. They just jumped right in and started building! No worries, no second guessing... just having fun. So I took a deep breath and dove in to make what I love and here are the results....I was rather impressed with my trio of Holiday Hot Rods.
 We have the Easter Bunny in his souped up carrot car.
 a haunted Halloween hot rod equipped with claws and spider web wings
and Santa's magical horse drawn sleigh.

All and all it was a fun afternoon even though the kids weren't as impressed with my creations as myself and Lianne were. It didn't help matters when I told them these were just too good to destroy so Daddy is going to glue them together when they were asleep ;)

Any fellow Lego designers out there?

Tuesday, February 19, 2013

Didn't make the cut!

Sometimes not every sketch in our sketchbook translates well into clay. These aren't terrible but they might just need a little more tweaking and rethinking. Most of the time our collection launch deadline doesn't allow us to go back and forth to make it just right, so we’ll pass on them and maybe revisit them for our nex collection.   

Here are a few examples from our recent Valentine's collection faux pas that for some reason or another didn't work.
Our sketch of this Swirly Love bird delivering a sweet Valentine looked so cute with the bird holding the Valentine letter and the heart wings, but something just didn't click. Maybe it was the shape of the eyes or the size of the beak? Hmm. We even added color to see if it would pop or something.
Nope. Nada. Didn't quite work out.
 
So the few mock-ups of these love birds we did produce are displayed on our little tree in our entryway.

Hearts come in all shapes and sizes and coming up with new versions each year quite a challenge. These hearts just didn't work. The sweetheart design was just too big and bulky; the be mine heart color wasn't doing it; and the crepe paper on the love heart had way too many layers. Oh well.

 
Even this little guy went through a few changes before landing into our Winter Love set.

The original sketch had him wearing a snow cap ....nah.
  
How about a party hat and a flower? Super cute, but just not the right fit for the collection set.
There is really never any mistakes when we are creating, and we feel it's is all part of the creative process.


Monday, February 18, 2013

Teaching 22 second graders!

A few weeks before Valentine's Day I was asked to teach a craft project to my son's second grade class. I was excited but somewhat scared. What kind of project can I teach that will keep the interest of 22 kids? And have it be easy and fast?

I knew I wanted the project to be creative yet simple but something they might not have tried before. My first thought was doing an origami project but after discussing it with Lianne and posting it on Facebook I quickly switched directions.  So with a little cruising around Pinterest, I came a across this fun project that would be perfect and gave me an opportunity to show the kids something new.

After having the kids cut out their hearts for the butterfly wings. I showed how you can paint and stamp with everyday objects. Like making a paper towel roll into a heart shaped stamp, cutting up sponges to create texture, and Q-tips to make dots and toothpicks to create tiny hearts. The kids really seemed to enjoy knowing you don't always need paint brushes to paint with.

We also created book marks with the extra paper. These were my samples. The kids versions were so much more creative. Only wish I had a camera.  I had a blast with the kids but also have a whole new respect for the teacher. It was an eye opening experience working with 22 kids and seeing how different each child approaches a project.

Tuesday, February 5, 2013

Decorating for Valentine's

We love creating and making beautiful ornaments to adorn your our Swirly fans homes for every holiday to the point we sometimes get side tracked and forget to decorate our own home.

So yesterday toward the end of the work day, we had a little time to spare (which is rare for us) as we were cleaning the studio up. As we started organizing the colorful paper we have collected, we thought hmmm we could either stay in the studio and clean....or take some of that cute paper and dress up our entryway. YES that's it!

Here is the result! Using scrapbook paper and a  few other items we totally transformed out entryway into a Valentine's showcase. Oh so sweet and very easy to do it yourself as well!
We made this picture gallery wall last fall and yet their are still picture frames without family pictures in them. So this was a perfect opportunity to put some pretty magazine pictures or decorative paper into the frames and voila the wall sings Valentine's. 
We added what few of our own ornaments we had left over from our Valentine's collection to this yarn wrapped tree we picked up at West Elm this past Christmas.
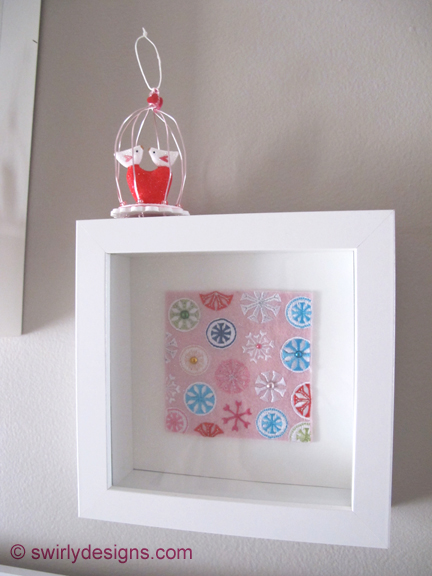
Our tweet heart bird cage sample sits on a square shadow box with a fabric greeting card inside. We love to frame greeting cards!
We made this snowflake shadow box as a mock-up for a possible how-to. But now it's happily displayed on our wall.
As you all know we are fans of magazines especially holiday related issue (see here and here just to refresh)  So we when came across this display piece that someone was throwing out we knew exactly what we could use it for.  It's fun going thorough old holiday issues and displaying them each holiday. 
This gold table top tree is the only permanent tree that we have in the house all year long (not including the trees in the studio of course). It greets our guest as they enter our home. It's mostly decked out in gold woodland ornaments but we'll add a spot of color to give it a seasonal pop! Adding a few seasonal ornaments, some beads, and a piece of 12 x1 2 scrapbook glitter paper under the tree and it is transformed.
On the other side of the entryway we have a shelf above where we hang coats.  A perfect place for more frames that we filled with valentine images. Books and other items share the shelf as well.
So simple and so rewarding... in less than an hour we transformed our entryway into a Valentine's gallery. So what if it's only up for only a few weeks and so what if only a few family members will see it. Hey maybe the UPS man will appreciate it:)

Do you decorate your home for Valentine's?  Which room do you decorate the most for the holidays?
Happy Valentine's
~Lianne & Paul

Sunday, February 3, 2013

Images from our Valentine's Collection

 
Happy Valentine's Day! With only 11 days to go we can finally take a little breather knowing our Swirly cupid has delivered all the orders that came in since our launch on the 28th.  Just so you know you can still order all the way up to and even after Valentine's.  These designs are nice for a little girl's birthday, a baby shower or if you just want to show someone you care. 
  
With every collection we launch we'll take more than enough photos and even though we only had 12 designs in our 2013 Valentine's ornament collection we ended up taking over 300+ images to make sure we get the best shots to represent our collection.  Having so many pretty shots that didn't make the cut we thought we would share some of our favorites.


Related Posts Plugin for WordPress, Blogger...