01 09 10

Thursday, April 26, 2012

Happy Birthday to our little girl!

Max & Ruby theme party
Our little girl turned three this month...so as soon as we wrapped up our Easter collection we jumped right into party planning mood creating and planning a sweet little party for Chloe and a handful of her little friends.  Her theme was from her favorite book Bunny Cakes by Rosemary Wells.
Oh how they grow so fast!
Happy Birthday to our silly little girl!
xo  

Friday, April 6, 2012

Happy Easter!


We want to wish all you a very Happy Easter weekend!
xo
Lianne & Paul

Thursday, April 5, 2012

Easter Egg Carton Basket How~to

This project is for personal, non-commercial use.

This mini egg carton basket is a sweet treat that you can also decorate your Easter tree with! Or use as a place setting or to give tiny treats to your guests this Easter time. They are so fun and simple to make you'll just want to make A LOT of them.
Here's how:

Materials This is for a purple basket but you can choose any color you desire.
• empty egg carton (one carton will make 12 baskets)
• glitter eyelash yarn (We picked Martha Stewart yarn because we loved the colors!)
• Silver glitter pipe cleaner
• 3/8 purple satin purple ribbon
• Craft paint (MSC color Hydrangea purple) and brush
• 1/16 circle paper punch
• glue gun
• scissor
• needle nose pliers


Step 1.
Begin by cutting out the egg cups. One carton will make 12 mini baskets.


Step 2.
Cut and level off the top of your egg cups so it looks like the picture above. You will have a few that have circle openings; this is fine because they will be filled in with yarn. Your cup should be at least an 1" tall.


Step 3.
Paint your egg cup basket inside and out. Let it dry.


Step 4.
Heat up your glue gun and take out the glitter eyelash yarn. We used the Martha Stewart line because we loved the colors it came in, but use whatever brand you prefer.


Step 5.
Start in the inside of the basket and glue a little dot to start your glitter eyelash yarn.


Step 6.
Then just keep adding a little hot glue and wrap your eyelash ribbon around the basket.


It will look like this when done. Let the glue dry.


Step 7.
With your 1/16 circle, punch two holes across from each other and approx 1/4 down for the handles of your basket.
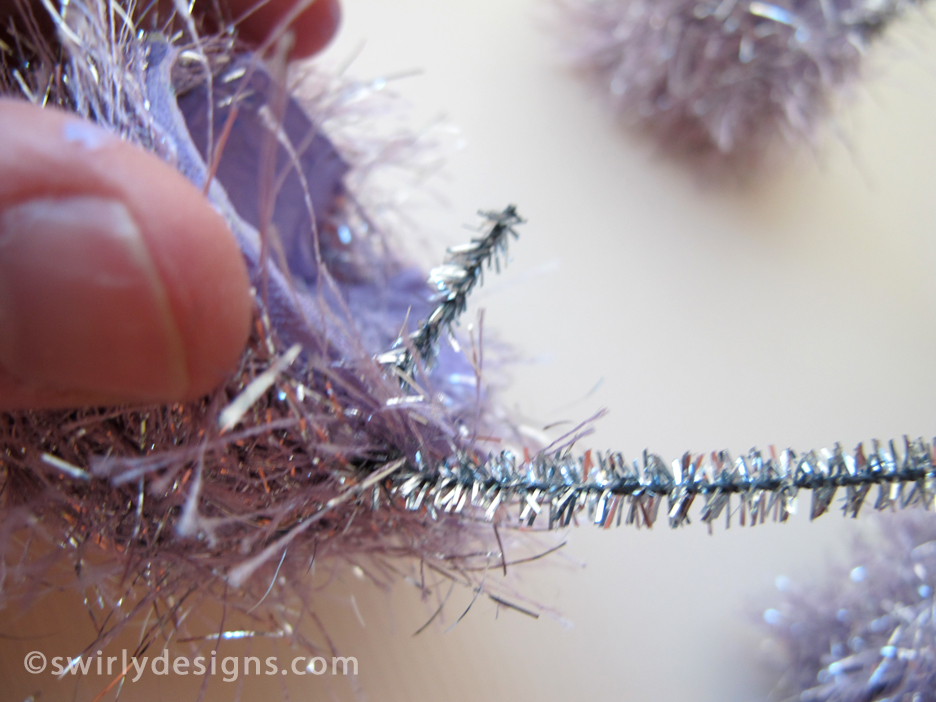

Step 8.
Insert the silver glitter pipe cleaner into the hole. Adjust the size to of the handle.


Step 9.
Now take and twist up the remaining pipe cleaner that is facing into the basket. Use the needle nose pliers to squeeze the end down and get rid of any sharp wire sticking out.


Step 10.
Add a 3/8 wide purple bow to the top and you are done!

You can embellish your basket even further with paper flowers or a paper Easter message. Then fill your basket with sweet treats like jelly beans, mini eggs or a mini chocolate bunny or even a small toy.


Happy Easter!
Lianne & Paul

Tuesday, April 3, 2012

Our Easter designs

Is everyone getting ready for Easter? We've been busy playing catch up here at the studio, making sure we post everything we wanted too for this season like these beauty shots of this years 2012 Easter designs.

We all know the early timing of Easter made everything feel rushed. We weren't able to take a lot of extra photos of the Easter collection. Even though the majority of the designs are sold out, we still wanted to share a few favorite shots that we captured of some of the designs.


Happy Easter!

Etching during lunch

Spent some time after lunch etching a few of the Easter eggs we dyed over the weekend.

Monday, April 2, 2012

Love Egg Dioramas


Before we start cleaning up the studio to get ready to start designing our next collection, we pulled out the materials for the egg dioramas that we created for our Holiday how-to project for Polyform last month. We had such a fun time making them we just had to jump back into it and create another one. This time around we created a sweet little white bunny surrounded with yummy carrots in a field of greens.

Sunday, April 1, 2012

Some bunny loves you...


With Easter only a week away and having all our Spring orders shipped out and arriving to everyone this week. We can now focus on celebrating this week.

So we thought we would start with a post about one of our personal favorite Easter ornament designs... Our Swirly Bunny! He has been apart of our Easter/Spring collections for the past five years. You just can't celebrate Easter or Spring without thinking of bunnies. So when we decided to included a Spring collection into our Swirly family we worked on many different ideas for creating the perfect swirly bunny and the outcome was this swirling coil approach that won our hearts as well as many of yours.

We always enjoy swirling this bunny each year and switching up the colors and designs.

Enjoy the look at past designs!

Our bunny is made by creating many long coils in different lengths and thickness and piecing them together.


The bright and happy lime green background is a great backdrop for this white bunny complete with a basket full of eggs!


What has stayed consistent is the background shape for these ornaments. The size and curvy shape works so well with the bunny figure. Our bright yellow version was very popular.


For one collection, we added a chocolate bunny version design to accompany our white bunny.


Over the years our bunnies have been holding different spring and Easter imagery like eggs, flowers and carrots.


Our chocolate bunny on a purple background, holding a little chick friend.


I know that this year Easter seems early, but remember back in 2008 when we celebrated Easter only 5 days after St. Patrick's Day! That was the year that inspired us to create this bunny holding a lucky shamrock. (This double holiday bunny was gone so fast that we never had a chance to take a good picture of the final piece)


By adding a ribbon bow tie to this bunny, it gave him that vintage touch.

Hoppy Easter!
Related Posts Plugin for WordPress, Blogger...